

2019
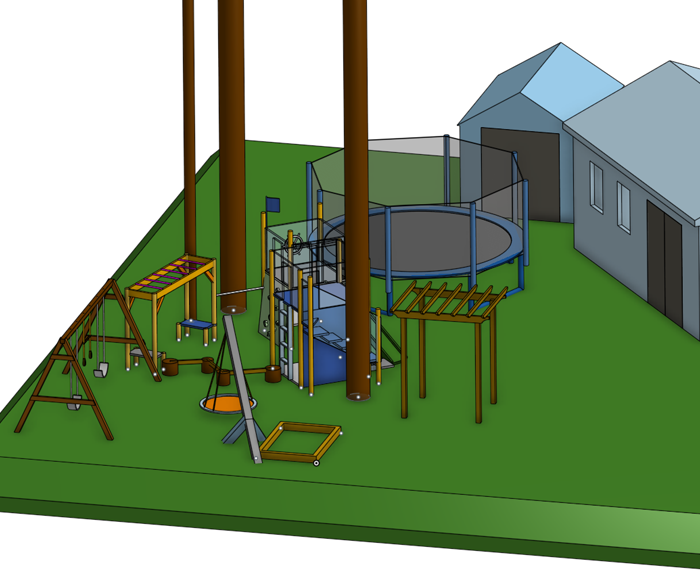
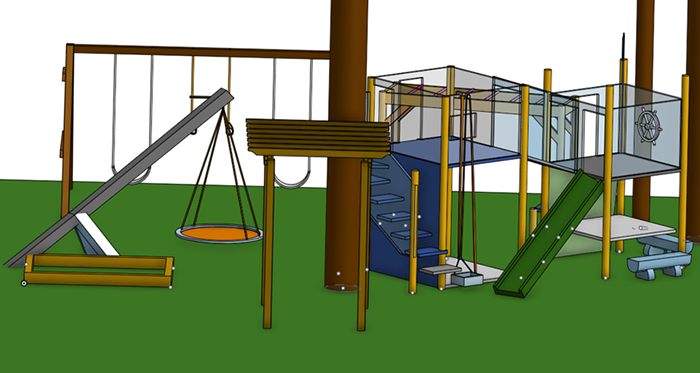
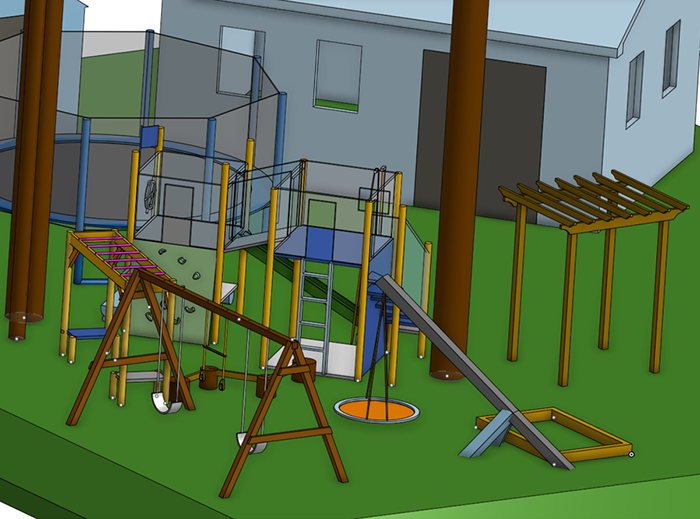
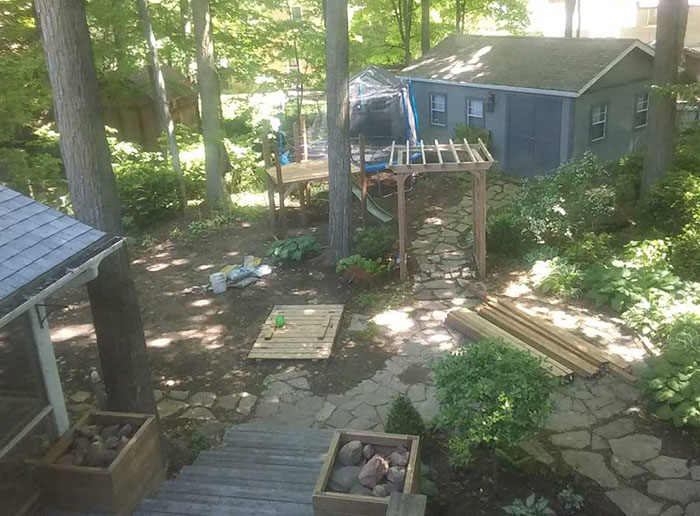
In May (before anyone knew about the pandemic), I started taking measurement in my backyard to draft a plan for a playground structure that I wanted to build for my kids. The original plan looked like this:
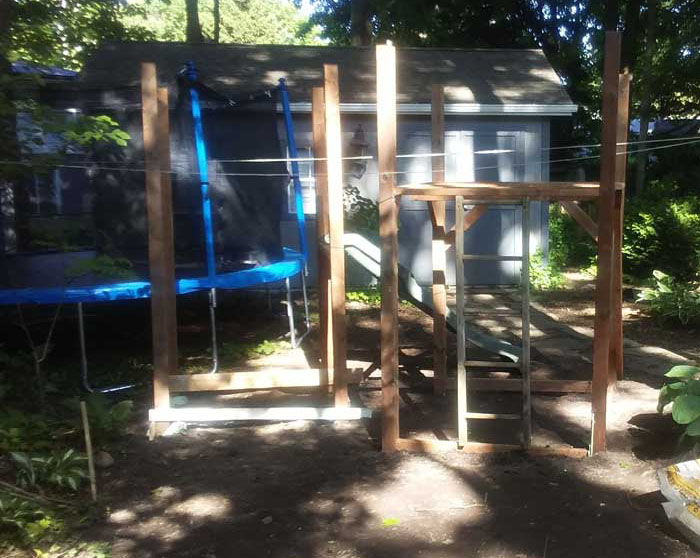
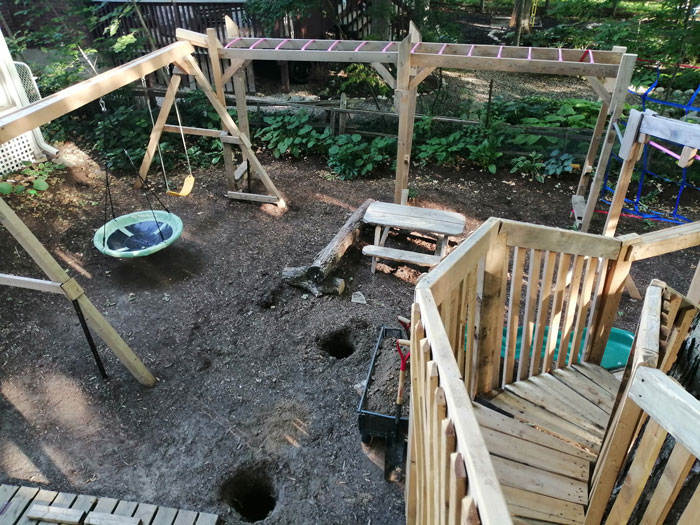
I started clearing all the bushes, leveling the ground and moving plants around to make room for the structure at the beginning of June.
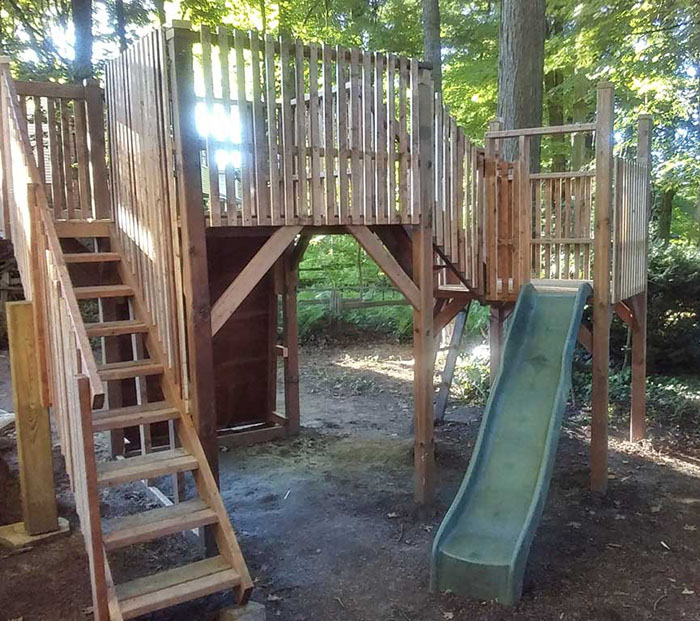
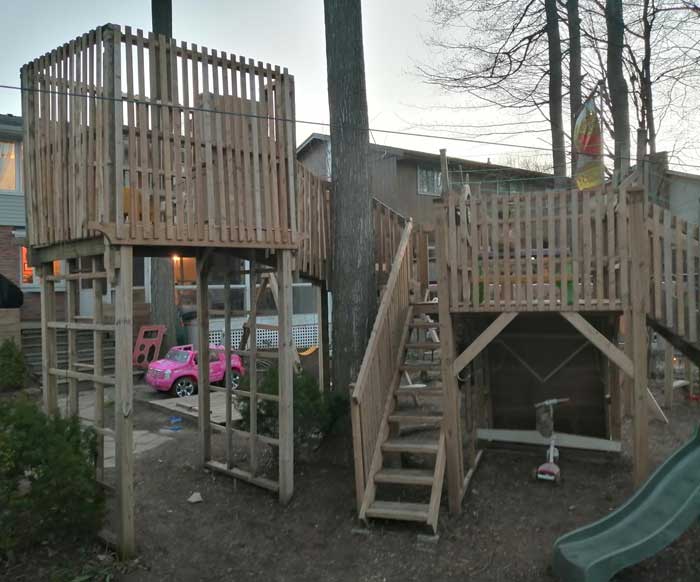
I started by putting 8 posts in the ground which would form the 2 platforms for the play structure. One platform is 4 feet off the ground and the taller one is 5 feet off the ground. Initially I had thought that I would put a ladder going up to the 5 foot platform as shown below.
Lots of gardening had to be done to clear all the space where everything would go... this was a 2 weekend project to move trees, bushes, plants and then to level the ground. The wooden rectangle seen at the bottom of the deck stairs is a sandbox that opens up and has 2 seats on either side. A better picture of the sandbox is shown later.
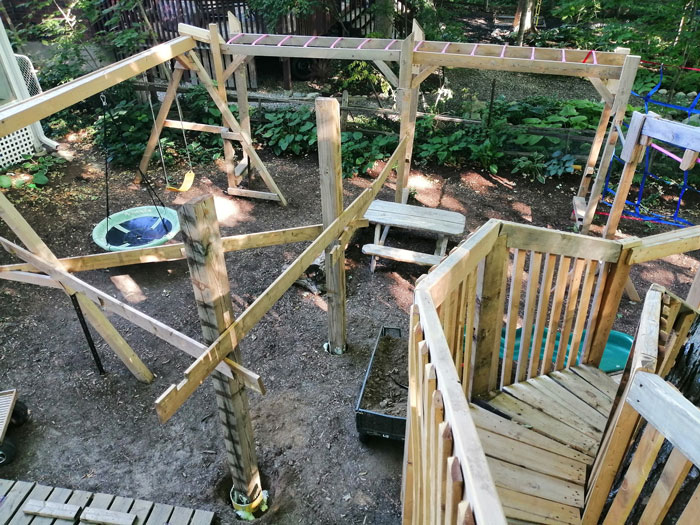
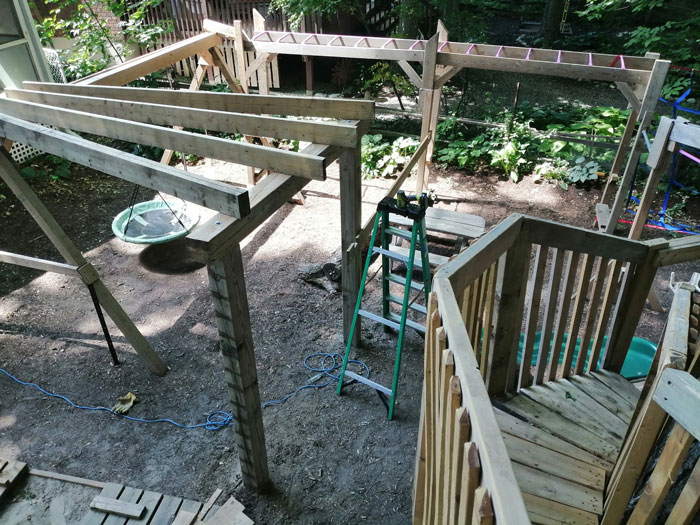
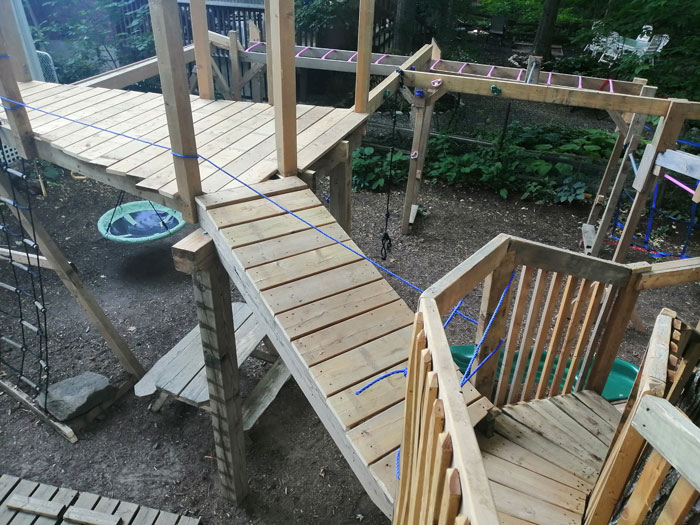
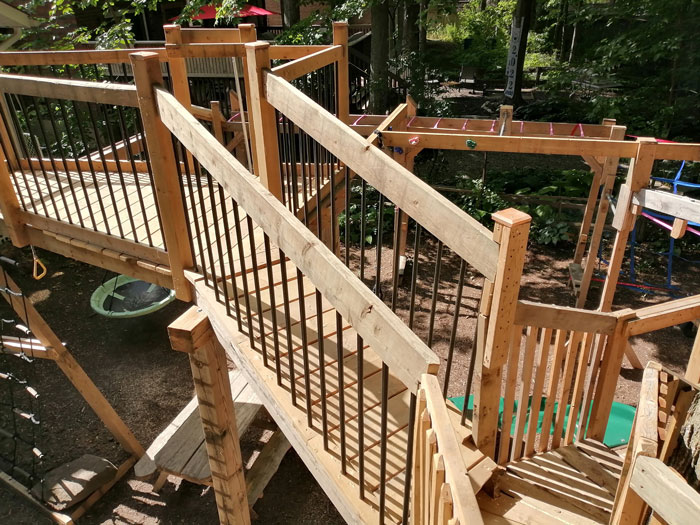
In the original CAD design I was planning on making a bridge between the 2 platforms, but after putting the 8 posts in the ground I realized that the 2 platforms are much closer together than originally planned because of all the roots I kept hitting. So I decided to make stairs between the 2 platforms instead. In the photo below I also just finished the main stairs going up to the 5 foot tall platform. Ropes were temporarily wrapped around the railings so that kids could play on the structure without giving me a heart attack.
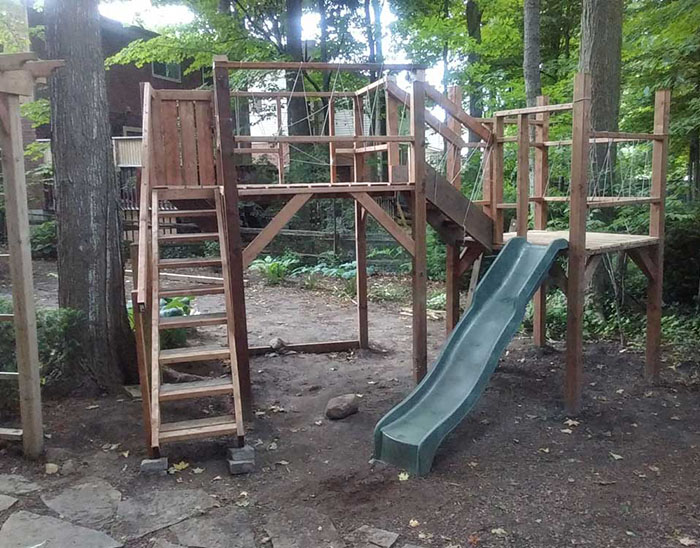
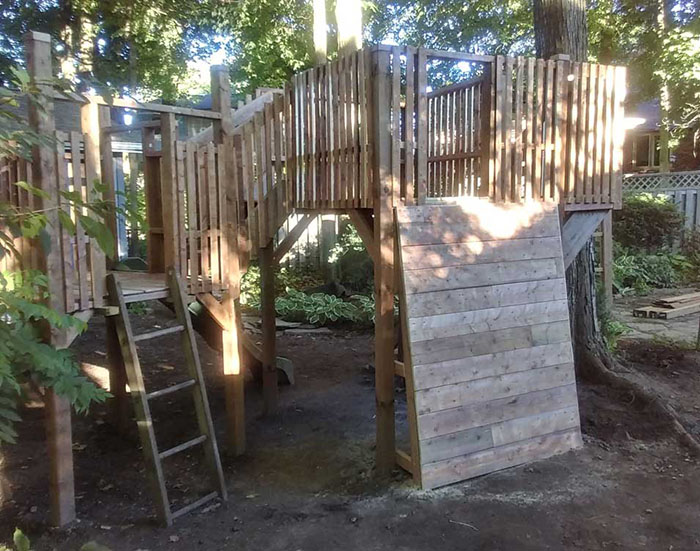
Ended up having to move the ladder from the 5 foot tall platform to the shorter 4 foot tall platform because the rock climbing wall that I wanted to put on the 4 foot tall platform wasn't going to be high/difficult to climb. Now that the ladder is moved the rock climbing wall can go on the 5 foot tall platform.
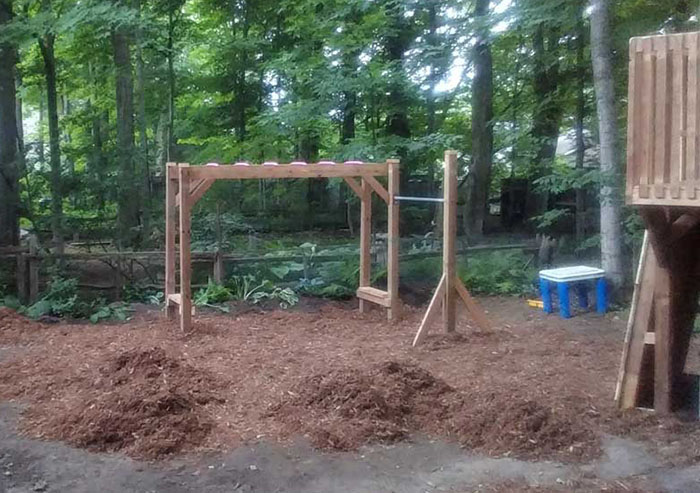
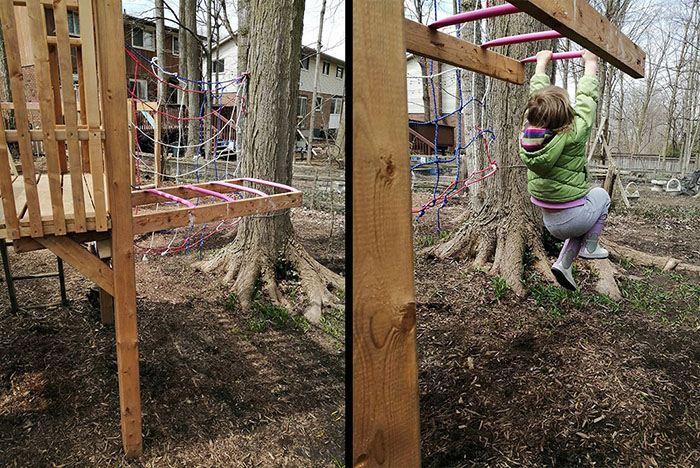
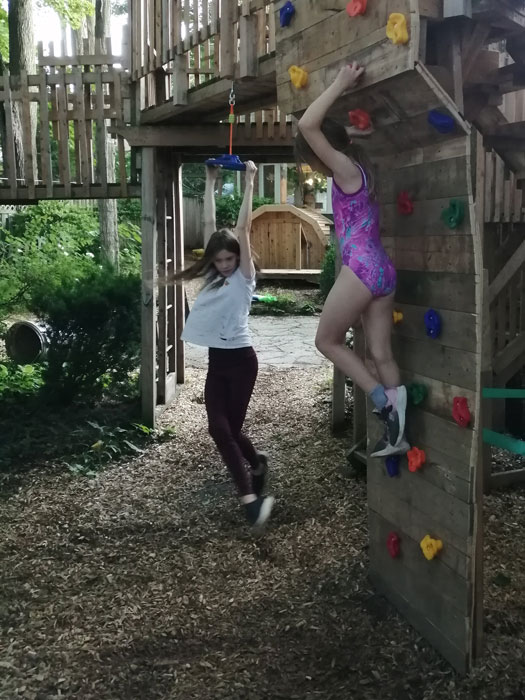
Here is a photo of the monkey bars and the turning bar. The kids love the monkey bars. My oldest has quite the collection of blisters on her hands!
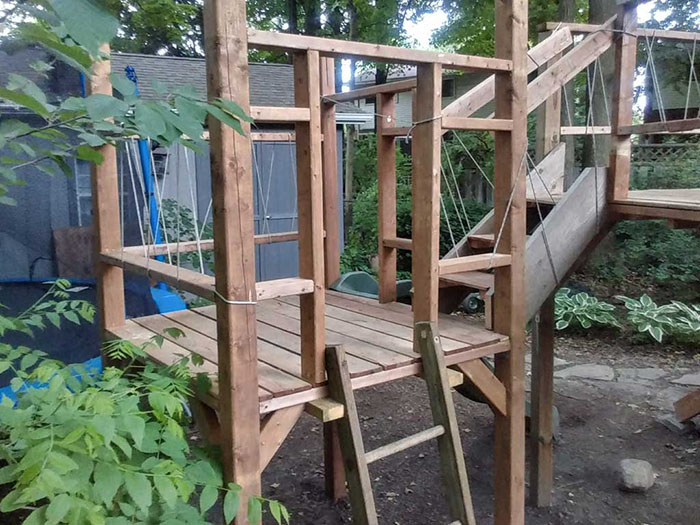
I wasn't sure how to make the “walls” to keep the kids from falling off the platforms so I iterated a few times until I came up with these small pickets. The gap between each picket is large enough for me to still see the kids in the structure from inside the house.
Here's the other side of the structure where the rock climbing wall will go.
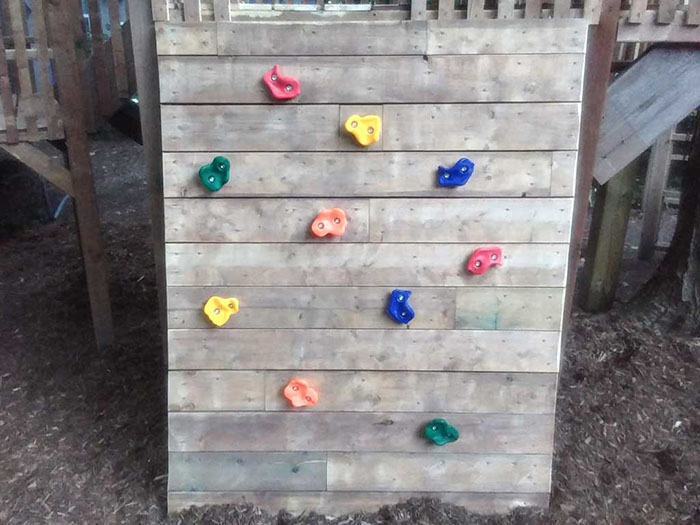
I really didn't know how to arrange the rocks on the wall, so I asked my oldest to draw some circles. I used that as a guide to place the rocks on the wall. I need to make one additional rock hold because as it is right now, my youngest can only get up the wall by starting on the bottom green stone. She can't reach any others with her feet. So my plan is to make one more hold and add it to the bottom left corner so that she can have some variety on where she will start from.
I purchased 9 cubic yards of mulch. 4.5 for the playground, and 4.5 for the surrounding gardens.
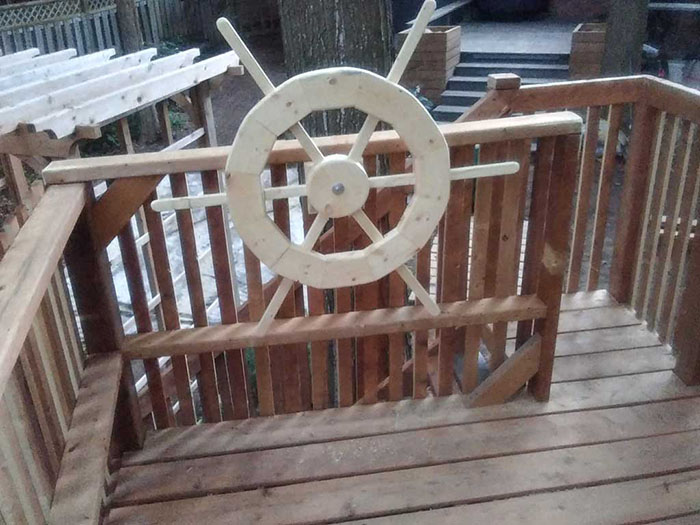
On top of the tall platform, I created a pirate ship wheel shown below.
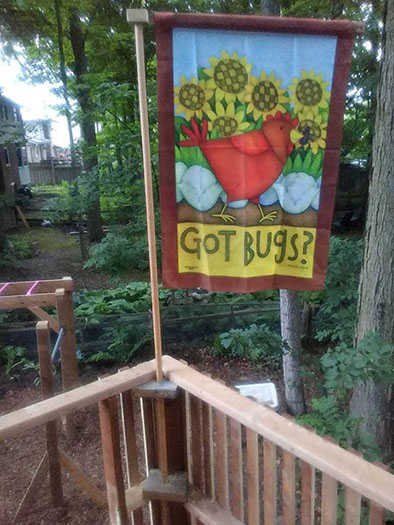
In the corner I placed a flag pole which can spin around 360 degrees in the wind.
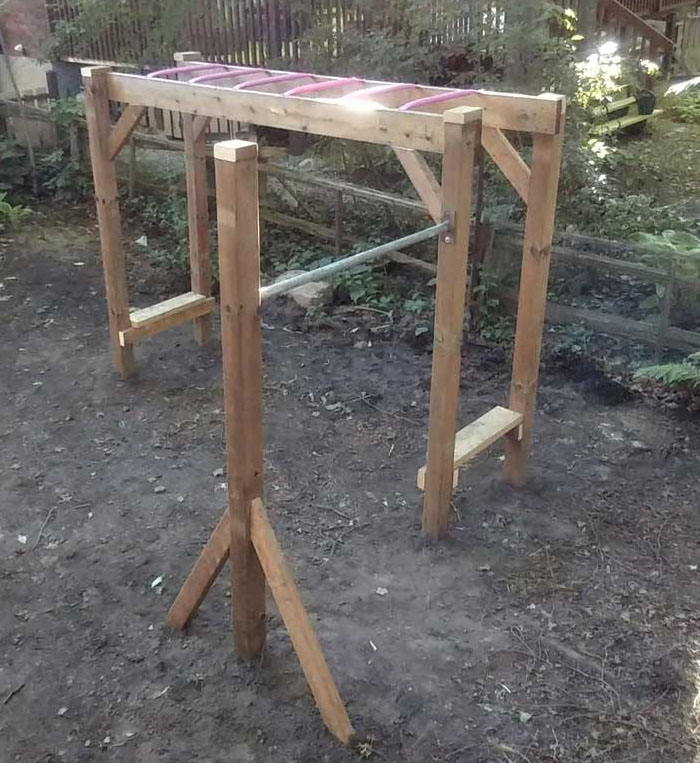
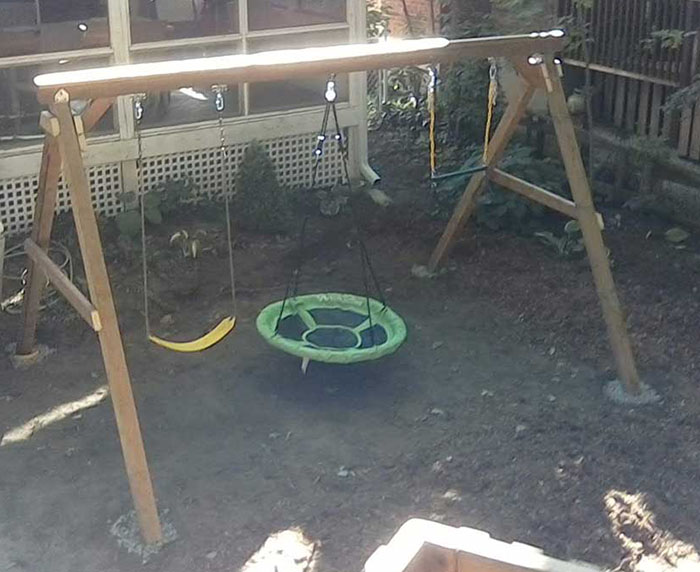
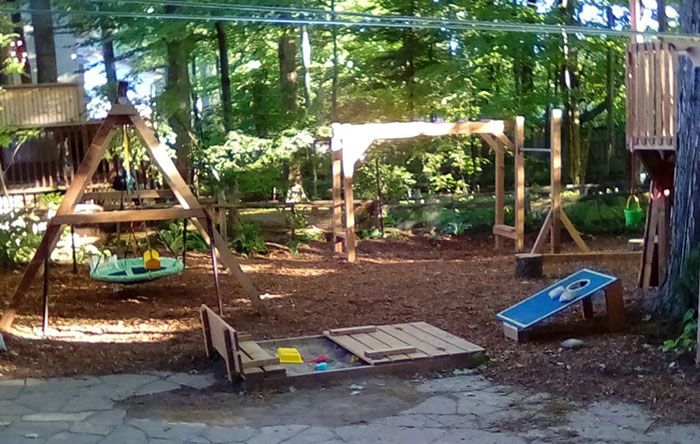
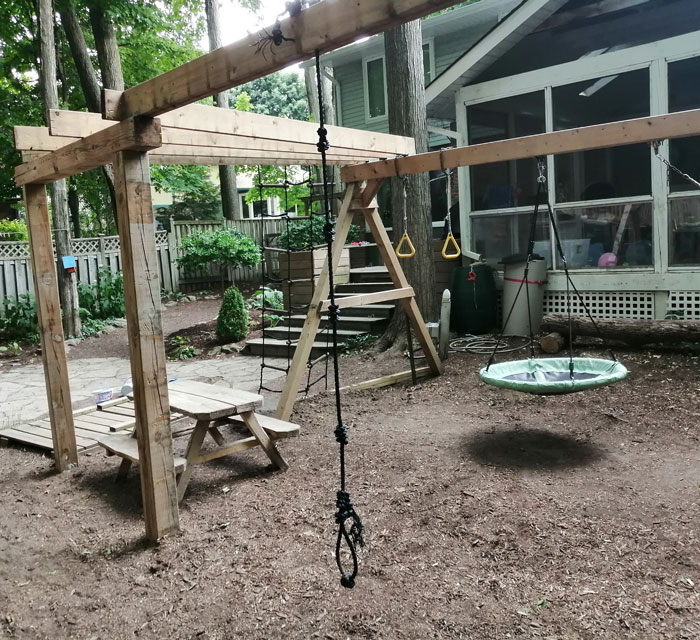
All playgrounds need a set of swings so I built this A-frame. I surprised myself on how I was able to level it perfectly and assemble it all by myself with just the help of a 6 foot ladder (Note, the top beam is more than 6 feet off the ground). The A-frame holds a regular yellow swing, a green 360 circle swing, and a yellow and green swinging bar with rings.
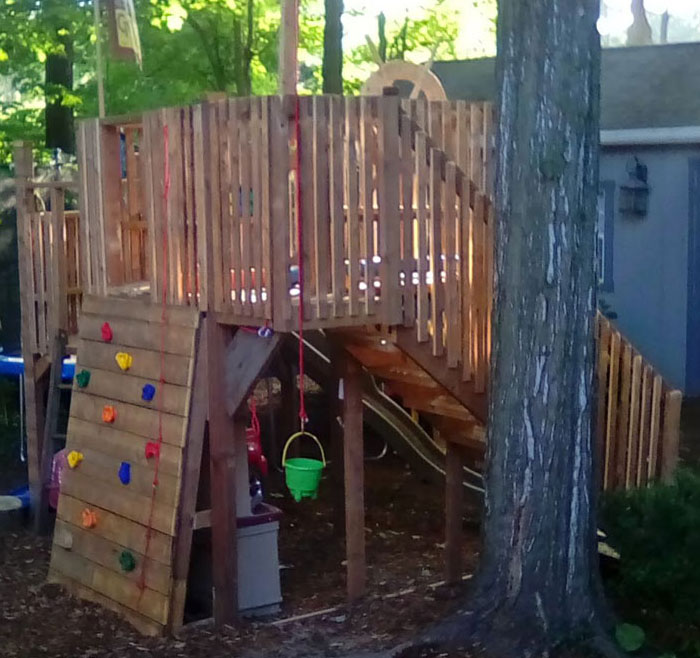
I added a rope with knots to the rock climbing wall so that the kids can climb up the structure in different ways. I also added a pulley and a bucket to the tall platform so that they can “elevator”-up toys from the ground to the top platform. They really like playing with that.
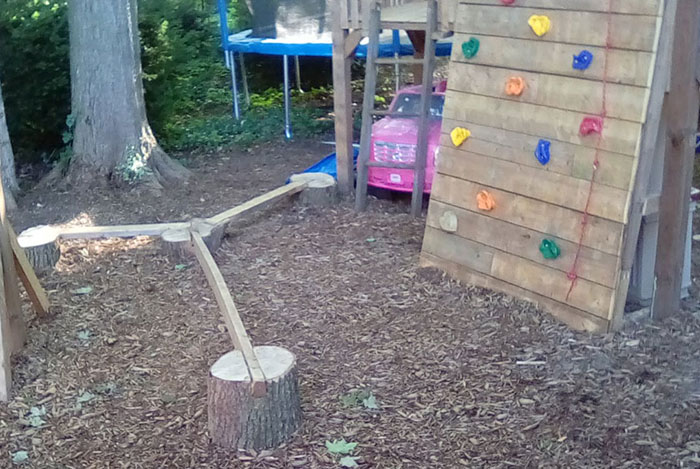
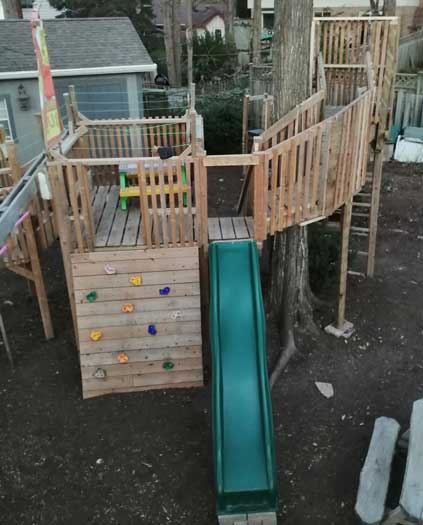
Below is a photo of the balance beams that I created. The far sections shown in the photo are 2x4's laying flat meaning the kids have 3.5" to walk on. The closer beam has the 2x4 mounted up-right so they only have 1.5" to walk on. In the photo below you can also see the extra rock climbing "rock" that I created in the bottom left corner of the wall. This extra heart rock allows my youngest to be able to access the wall from multiple sides.
The photo below shows the sandbox in it's 1/2 opened state. The lid flips up from the middle and folds back into bench/chairs on either side.
2020
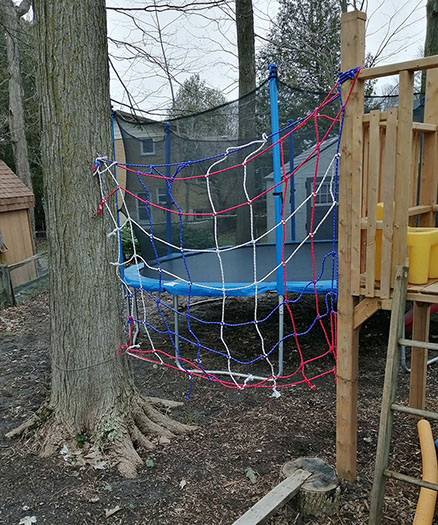
Over the winter I decided to try to create a cargo net using ropes and box knots. Turned out pretty strong, it can hold 200+lbs of weight climbing on it.
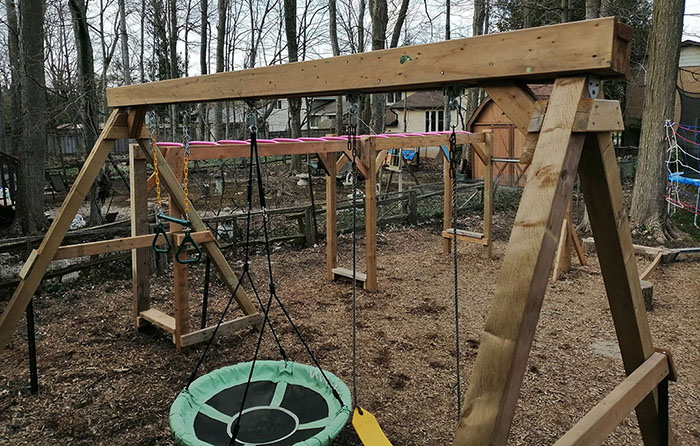
It's a new year, so that means new playground additions! Kids really like monkey bars, so I decided to build an extension to give them a longer climb. Only had to add one new post to the playground as the other one connected to the swing's A-frame is only a few inches below the surface.
I had 4 extra bars left over from the monkey bar extension so I decided to make a mini-monkey bar run for my youngest so that she could start learning to swing on them. She is still too short to reach the main monkey bar run.
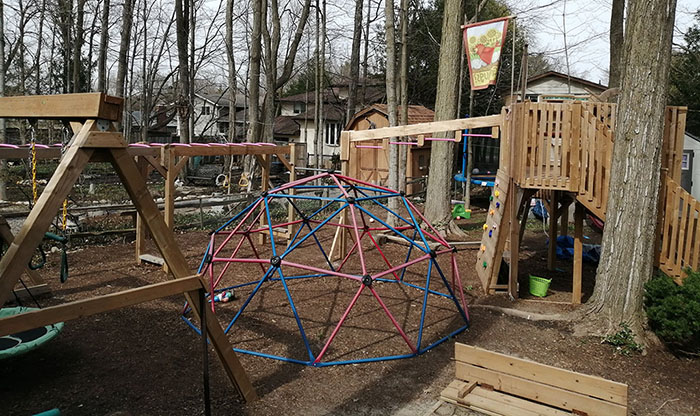
I found a guy selling a geodome which I couldn't resist. It turned out to be much larger than I had anticipated so I needed to chop and relocate 1 leg of the balance beam to make this work. Also by this time, my youngest had become a pro on the mini-monkey bars (and could now reach the main monkey bar run) so I recycled her 4 bars and made the horizontal stepping bars going from the turning bar, up to the top of the main structure as shown below behind the dome.
2021
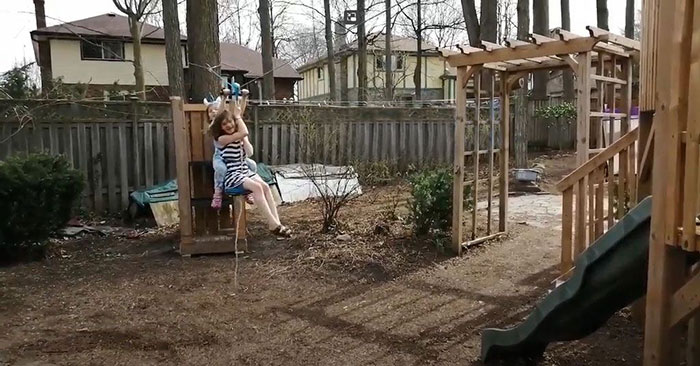
Time for some new playground updates! The backyard now has a zip line and a wooden picnic bench where the kids can sit, play or eat (shown later on in the photos). I had to build a tower that the kids could climb up and easily launch themselves from to use the zip line.
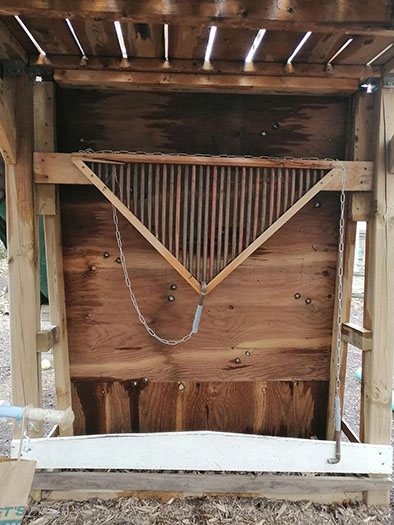
I had a bunch of copper pipe left over from a plumbing job so I decided to use the pipes to make the following "musical instrument" under the main structure of the playground.
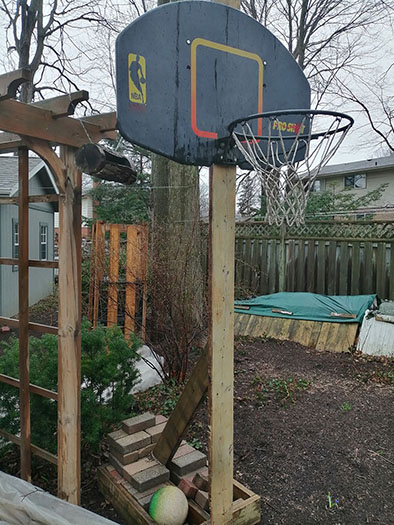
My kids need better hand-eye coordination so I built this basketball net stand for them. I found the backboard, hoop and net online for $20 (used). After just a few months of shooting hoops, my kid's aim has improved quite a lot ... and so did mine!
2022
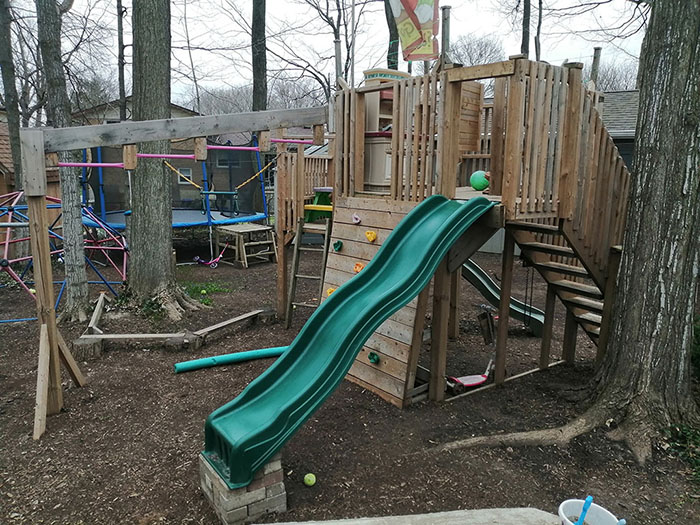
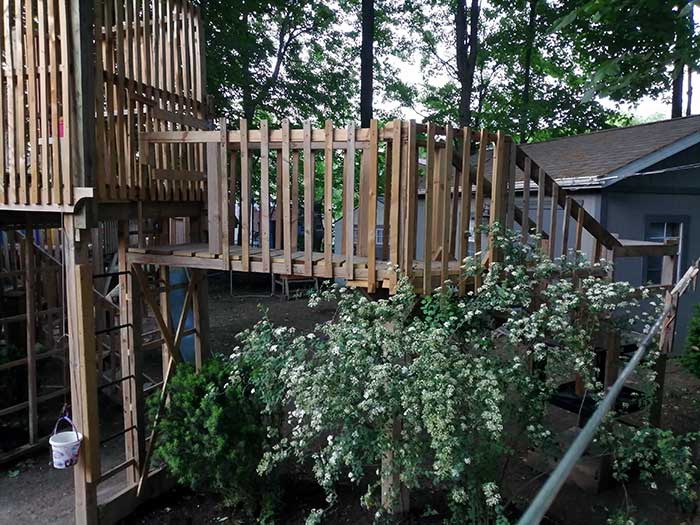
A new year means new upgrades! One of my neighbours was throwing out a slide last year in the fall, I couldn't let that go to the dump so I grabbed it and attached it to the playground. The problem was that these slides are meant to be attached less than 4 feet off the ground, but the platform is more than 5 feet off the ground. I elevated the bottom of the slide to make up the difference. The wood spindles that were removed at the top of the slide (to make the opening) have become a door that swings and locks at the top of the stairs now (kids have been asking for a door for a year now). The geodome had to also be moved to make room for the slide, so the balance beam was extended between the trees to connect the dome to the old/original balance beam.
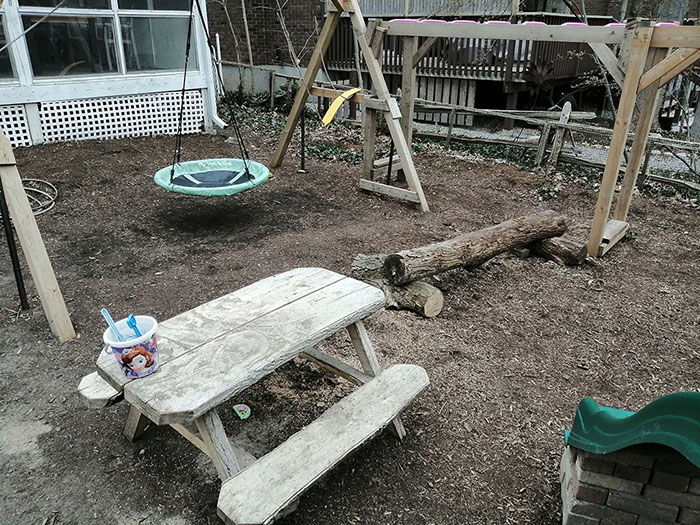
Here is a photo of the wooden bench I created last year. I milled a log using a chainsaw down into 2" thick planks of wood, and connected everything together with screws. Between the bench and the monkey bars is a new "natural log" balance beam. It can also be used as extra seating by the kids. One of my neighbours was throwing out about fifty 6 inch long metal carriage bolts (the ones you typically find in playgrounds holding big logs together). I used 4 of these bolts to securing the log pieces together so that the top log doesn't roll onto anyone.
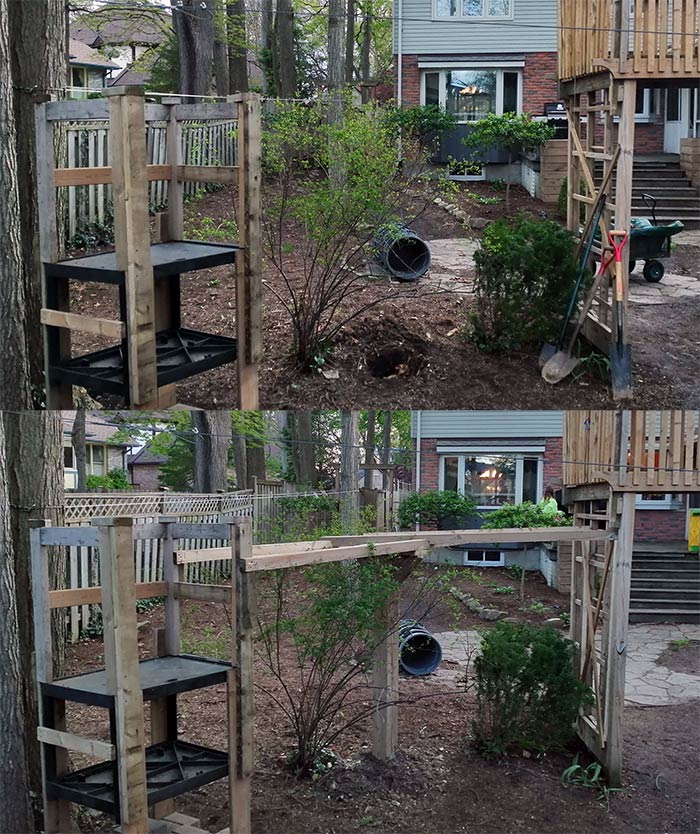
Time to expand the playground with a new platform. I have this pergola close to the existing playground structure, lets put a new platform on top and connect it up with a ramp.

Making a little bit of progress; I added a floor to the top of the pergola and joined it to the existing structure with a ramp. Starting to put up the railings too.
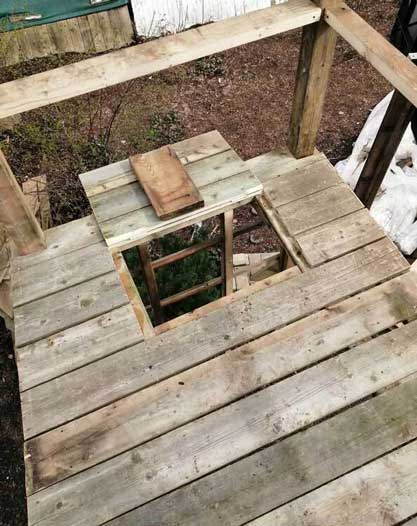
The new platform has a trap door built into the floor that connects to a ladder that goes down to the ground.
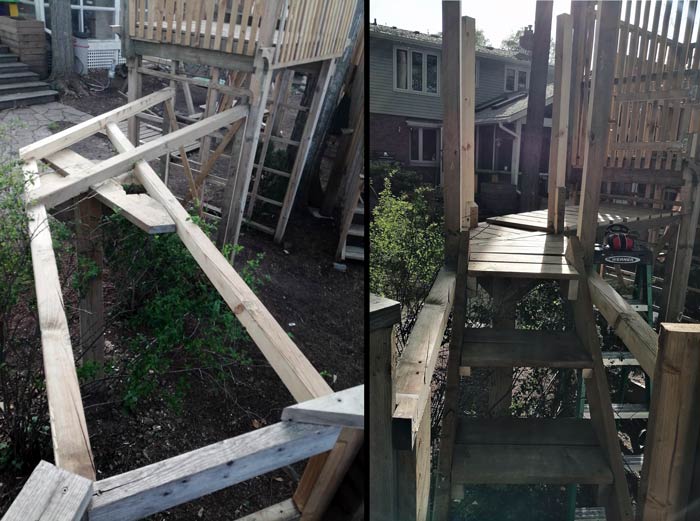
Finished putting up the 4 foot tall walls on the new platform.
Railings are up on the ramp that wraps around the tree.
I inherited some wood from my neighbours which means I can now expand the playground some more. First thing on the agenda is to raise the monkey bars! The kids have grown and the oldest can now reach the bars flat footed from the ground. Up they go ~2 feet!
Next up, time to dig some more holes.
I've placed two 10' posts in these holes which will hold a new platform that I will build next. These posts will also allow me to run beams across to the other parts of the existing playground for other new editions to come.
Here I'm installing the crossbeam and joists that will be used for the floor of the new platform.
The new platform can be accessed via a rope ladder on one side and a new ramp connected to the most recent ramp that I built around the tree.
In addition to inheriting wood from my neighbours, I also received a bunch of aluminum stair balusters. I used these to make railings around the new ramp and platform.
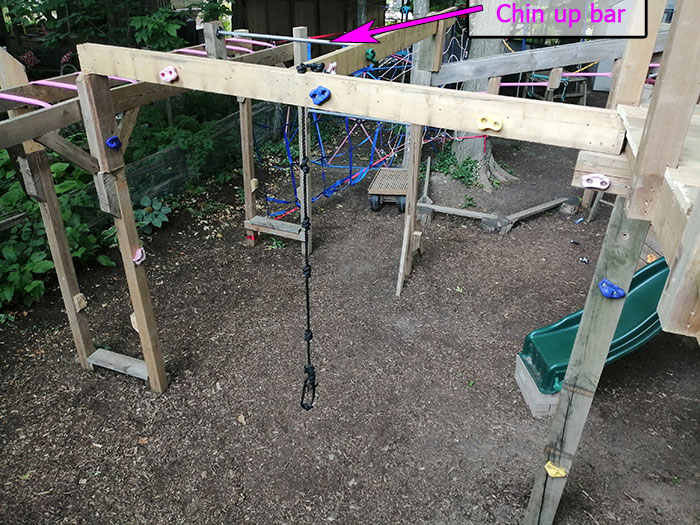
A new beam connecting to the monkey bars lets me install a rope swing. I am always surprised which parts of the playground become hits with the kids … the rope swing is one of those things they love to play on.
One more new beam connected perpendicular to the rope swing beam and now I have a place where I can install a chin up bar for the "adults". I also installed a bunch of rock climbing holds on the new beams to encourage random climbing.
The kids have been asking for a fireman pole for years! Now with the new platform I have a place where I can install one. I could only find a 10-foot-long pole at my local hardware store which wasn't quite long enough to reach the ground. So, I ended up building a little platform on the ground to make up the difference in height.

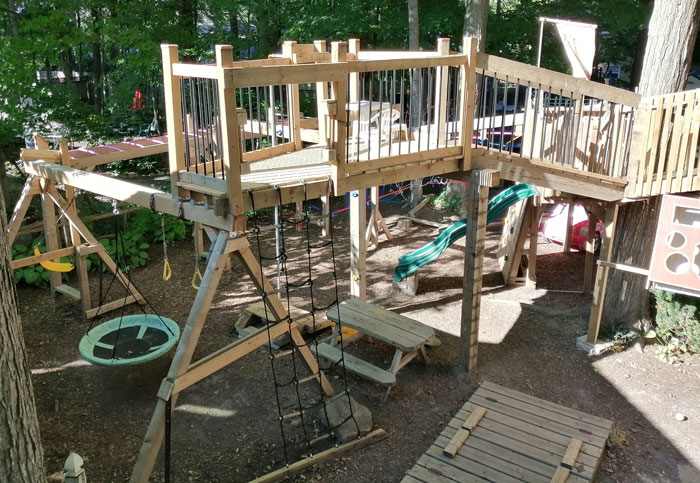
Finally, here is a photo of the completed new platform. That's it for 2022 updates.
2023
The weather at the end of March was cold (-10 C) and now at the beginning of April it is hot (+30 C).
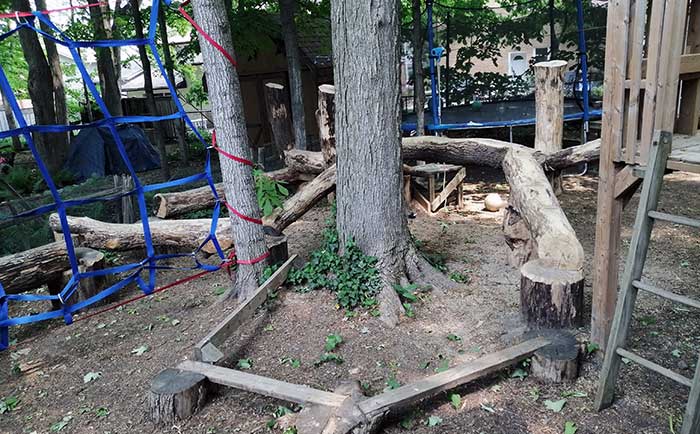
In December of last year I got rid of the geodome which was taking up a lot of space and wasn't being used very much. To replace it, I decided to start this years upgrade to the playground with a new climbing and balance structure.
I have a bunch of felled trees that I have been collecting, so I caber tossed them close to the work area and got started stacking, cutting and shaping them into this:
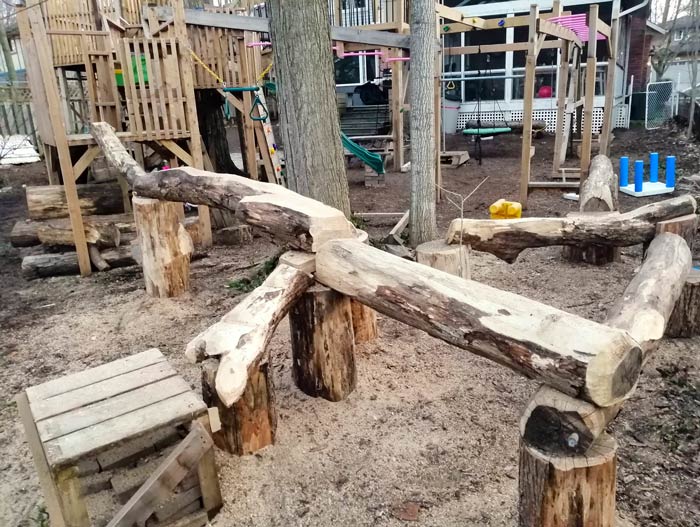
The kids can now go from the monkey bars, across the logs to the mini zip line stop platform, or continue on up the logs to the main playground structure.
A few more log ramps and vertical log posts have been added to structure.
Now it is time to connect the playground to the zip line. I start with a post in the ground to hold the new bridge.
The photo below on the left, shows the support structure for the bridge that connects the main playground structure to the zip line platform. The photo on the right shows the new steps and bridge flooring in place.
To get from the new bridge to the main structure I had to create a door. I added some cross braces and hinges to the existing spindles; one horizontal cut and voila, a new door!

Now some railings and another secret ladder and I can call it done!
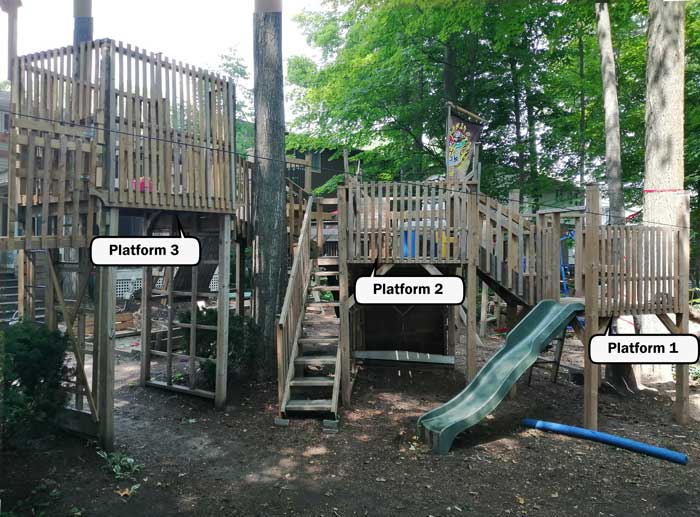
After talking with a friend about the playground on what I could add or change to it, he suggested that it should have more "loops" for the kids to play around. Right now the main playground structure is very linear; kids can go from platform 1 to platform 2 only one way, and the same thing for the path from platform 2 to platform 3.
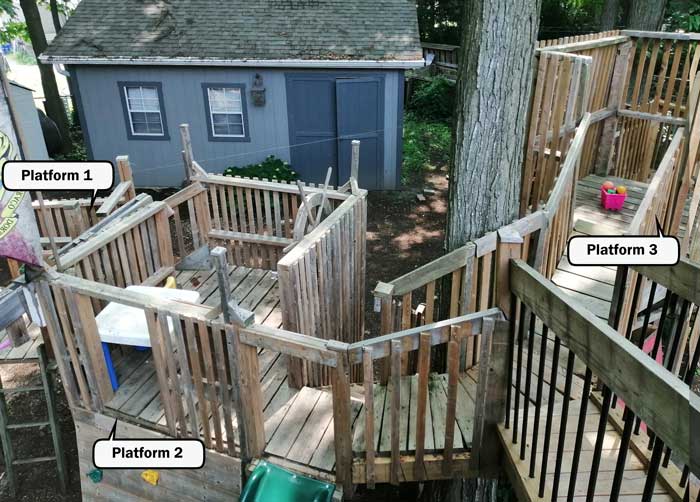
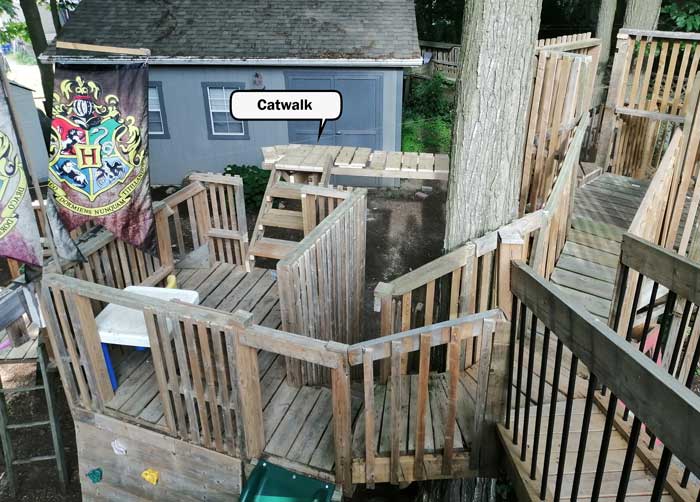
I decided to build a catwalk that connects platform 2 with platform 3. This change meant that I needed to create a set of stairs up from platform 2 to the catwalk, and pop open a doorway on platform 3.
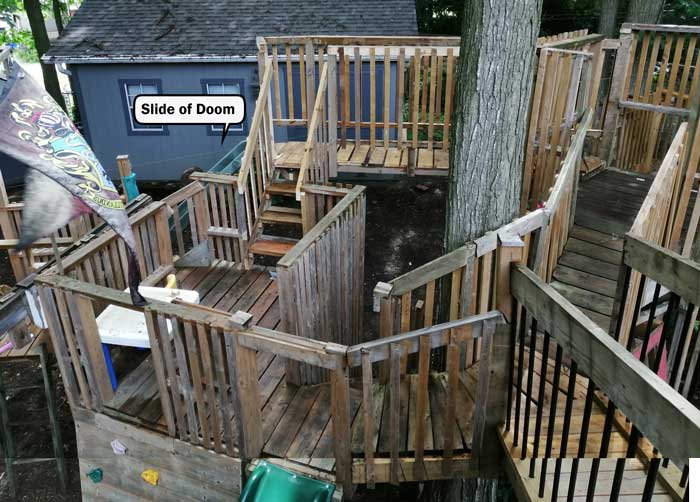
Lastly I moved the slide that used to go from Platform 1 to the ground. Now the slide goes from the catwalk down to Platform 1. The kids named this the slide of doom because it is a little terrifying sitting at the top of the slide with nothing on either side of you. I did add handrails to the catwalk to make it a little safer.
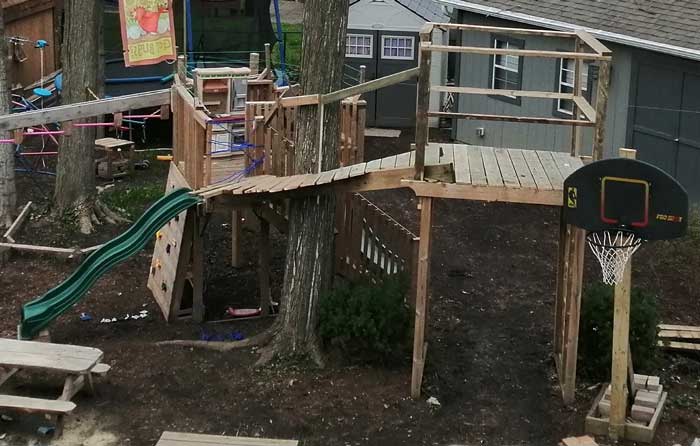
Here is a photo of the opposite side of the playground structure which shows how the three platforms were connected before building the catwalk.
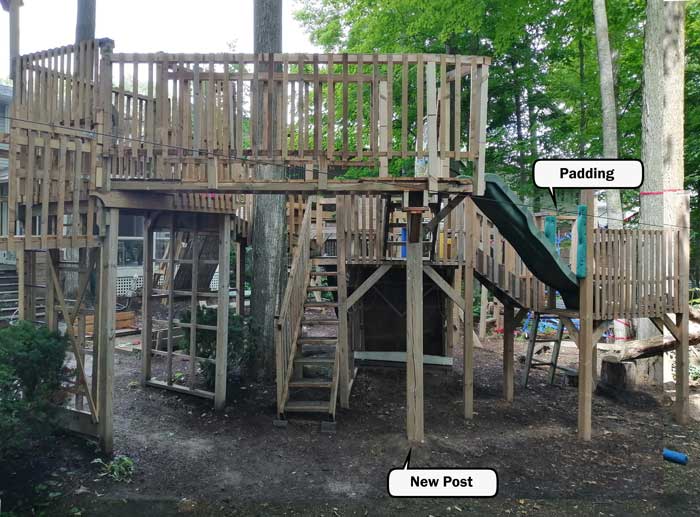
I added a post to the playground to hold up one end of the catwalk, the other end is supported by platform 3. The slide of doom ends on platform 1 so I added padding to the posts to prevent head injuries.
The backside of the Slide of Doom can be seen below. With this new catwalk, kids can now loop from Platform 1 to 2, or between 2 and 3. They can also go from 3 directly to 1 without going through 2.
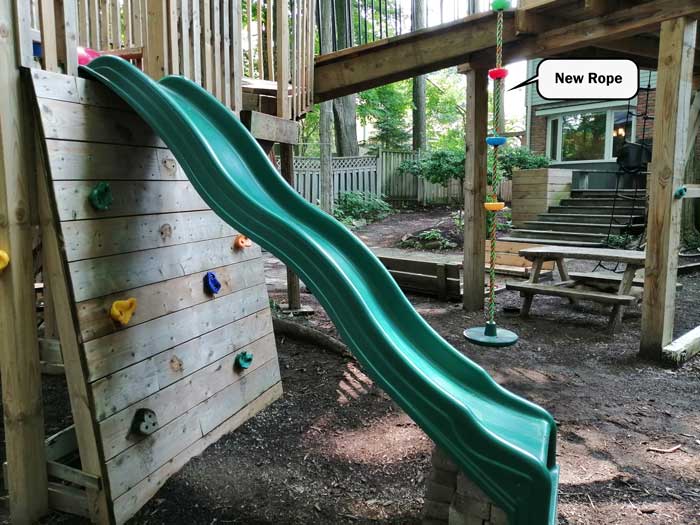
The climbing rope that I added to the playground last year is a big hit and used all the time to swing on. So I decided to add another rope swing to the playground. I had to move the green slide (shown in the foreground below) from its old location which was at the top of the stairs beside platform 2. The new location is at the top of the rock climbing wall that leads to platform 2. A few of the rock climbing holds had to be re-positioned but now there is (barely) enough room to swing on the new rope.
2024
In 2024, I started by removing the green slide that I moved at the end of 2023. The slide was getting hit too often with the kids swinging on the new rope and the slide wasn't being used very much anyway as a slide.
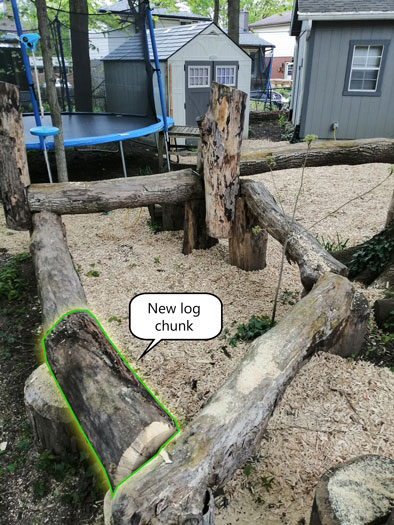
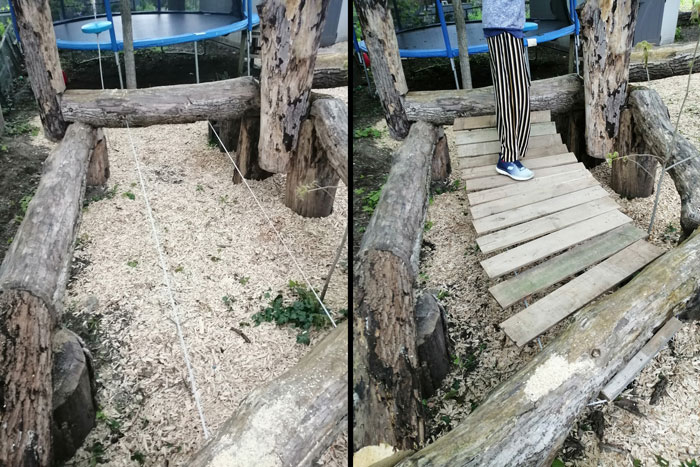
The first small addition to the playground this year was a new wobbly bridge. I wanted to place the bridge between the logs shown below, but this meant that anyone stepping on the bridge would be forcing the logs on the ends to squeeze together. To account for this extra force, I added a chunk of log to the existing structure to make a complete rectangular frame.
Now I could string some aircraft cable from the start to the end log as shown below to give me rails which I could then mount planks onto.
The kids really enjoy the dynamic elements in the playground so I purchased spinner wheel and mounted it in the following spot.
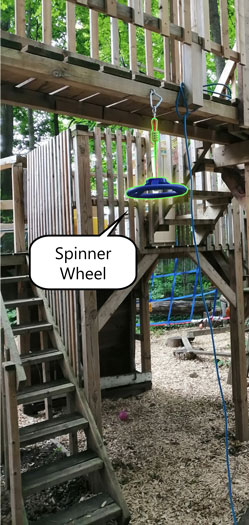
My oldest/tallest daughter can reach it with no problem, however my younger/shorter one had difficulties at first. Then she learned that if she stands on the stairs and leaps forward she can catch and spin all in one go!
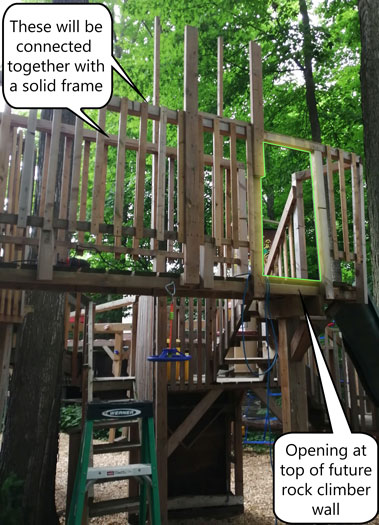
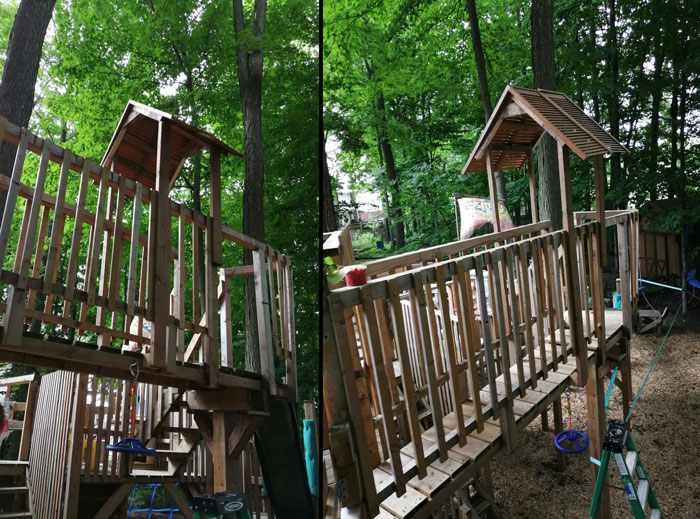
Next up, a taller rock climbing wall. I picked the following location because it was free from other hazards in and around the area, so if someone falls off the wall, they can land on woodchips rather than other parts of the playground.
The rail at the very top of the rock climbing wall needed to be stiffened up as it is a very long span that is only supported on either end. To accomplish this, I decided to add a small roof which would tie the left rail to the right rail that runs all the way down. In the picture below we can also see that I popped out a few of the vertical slats to make an opening where the "exit" will be at the top of the rock climbing wall when it is done.
I acquired some bifold closet doors which I cut down to size and mounted as the roof/shingles ontop of the rigid frame that I built. Now I can create a tall rock climbing wall, but first a slack line! We can see the slack line in the image below in the bottom right corner running from tree to tree and back to the playground structure.
The slack line starts on a tree, wraps around a smaller tree, goes to the big post I added in 2023, wraps back and connects to one of the posts that I put in the ground at the inception of the playground in 2019.
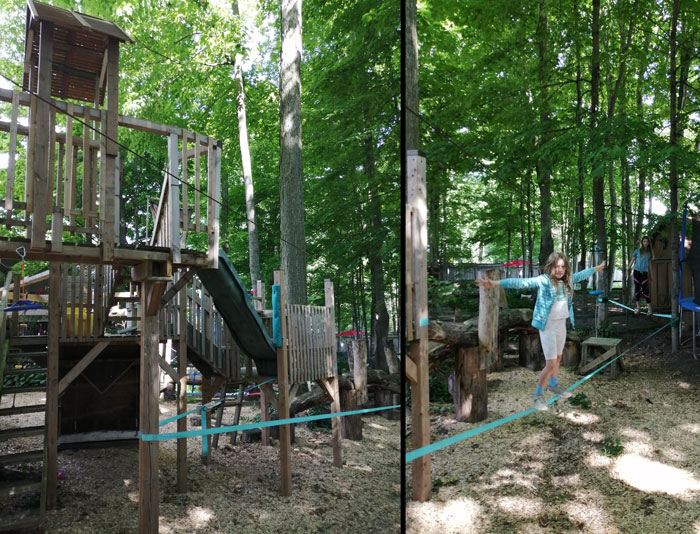
When the kids bounce up and down on the slack line, I noticed that big post wiggles a fair amount. To reenforce this post, I dug another hole and added a secondary post on an angle. This new secondary post also acts as a perfect support for the new rock climbing wall. The rock climbing wall plywood is offset by 1.5 inches from the big post to give clearance for the slack line. This way I can take the slack line down over the winter and put it back up in the spring.

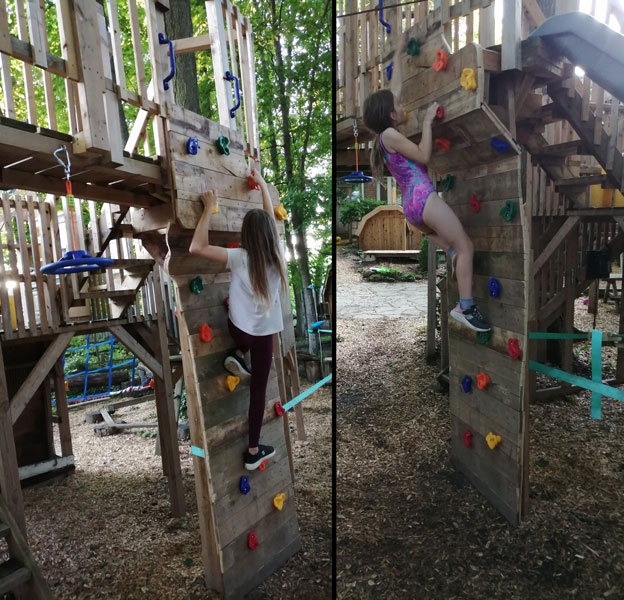
I built the rock climbing wall the same way as before. First lay down some plywood...
...then cover the plywood with horizontal fence boards and mount the rocks to those. Instead of a straight run up, I added a bit of a curve to one side, as well as an overhang to increase the difficulty of the climb.
Lastly here is a photo of the new spinner in action. It is pretty amazing how fast you can get going on that thing!
That's all for 2024!


