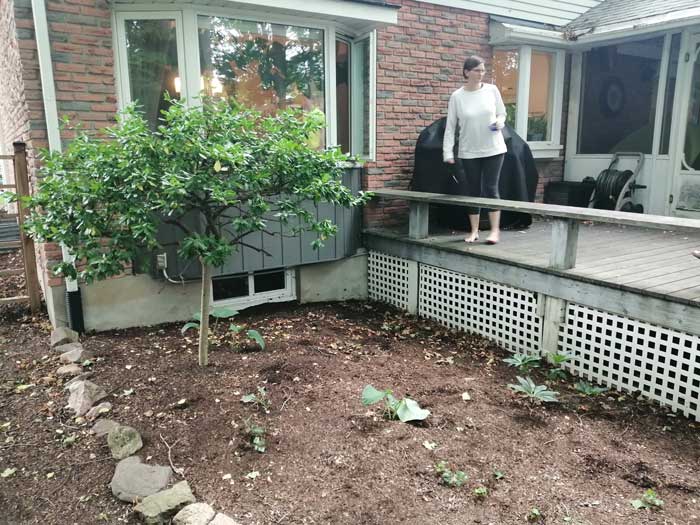
My wife and I have been wanting a sauna in our backyard for a few years, and in 2023 we finally decided where it would go. We wanted the sauna to be easily accessible from the deck so this location would be ideal.
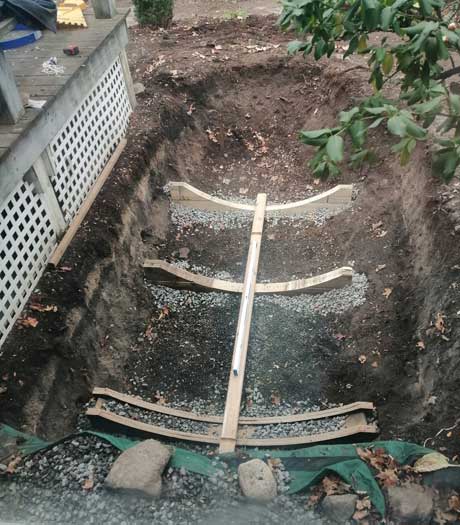
It was time to start digging. The plan was to make a 6' diameter, 7' long barrel that would sit right below the bay window of the house ... the bottom of the window is 5' from the ground, so digging 2' down would give enough clearance with drainage and the cradle. The hole would need to be 4' wide and about 9' long.
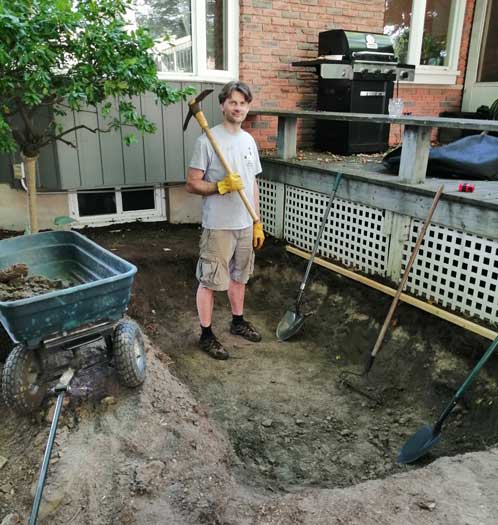
After one weekend of digging and thinking some more, I realized that a 6'2" person could not stand upright inside a 6' diameter barrel. So I had to change the plan to make a barrel that is 7' in diameter and 8' long instead. This meant more digging. Now the hole had to be 4' deep, 5' wide and 12' long.
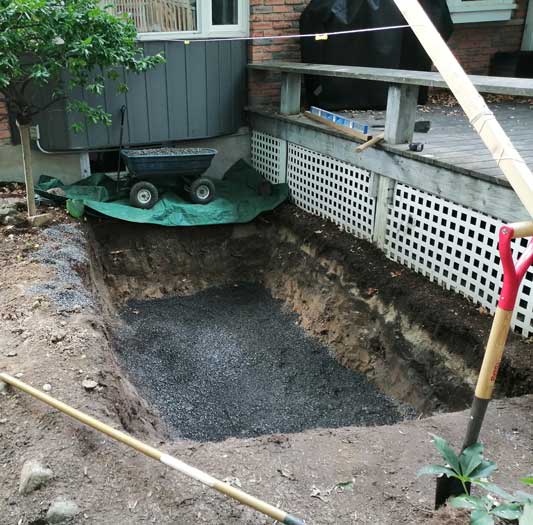
After another weekend of digging it was time to fill the bottom with drainage gravel.
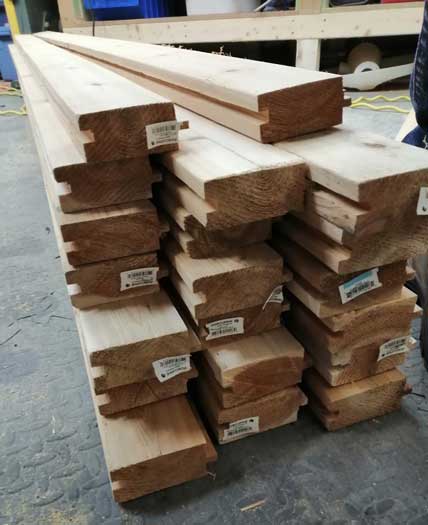
Now that the hole was done, it was time to buy some cedar. I rented a trailer and went to Home Depot (actually, I had to go to two different Home Depot locations to get all the wood I needed as one store didn't have enough cedar). I purchased a bunch of 8' long 2x4s and 2x6s. The 2x4's had to be shaped so that there is a tongue on one side, and a groove on the other side.
I joined the 2x4s together on the ground starting with the middle board. The middle board had a screw in it which I tied a 3.5'+ piece of string to. Using the string as a guide, I formed this 7'+ wide shape.
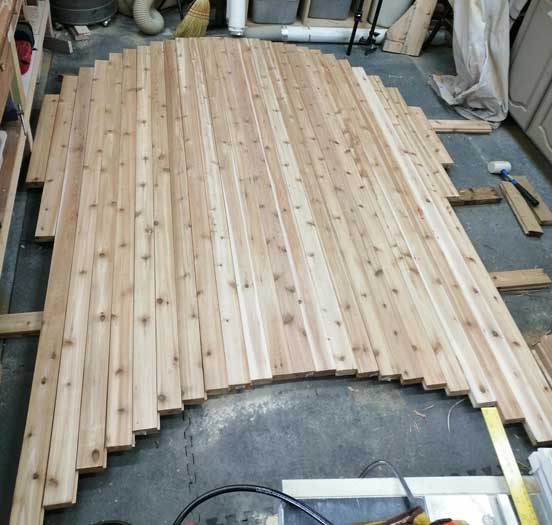
Now time to replace the string with a 4' long piece of wood that has two holes spaced exactly 3.5' apart. One hole goes over the center screw, and the other hole is used to hold a pencil. Spin this around 360 degrees and we have a perfect 7' diameter circle!
I then used a jigsaw to cut out the circle with minimal wasted wood. All the cutoffs will be used for the second circle and benches later on.
I added a few cross braces to the completed circle so that I could lift it up and get it out of the way. Now time to do it all over again to make the second circle.
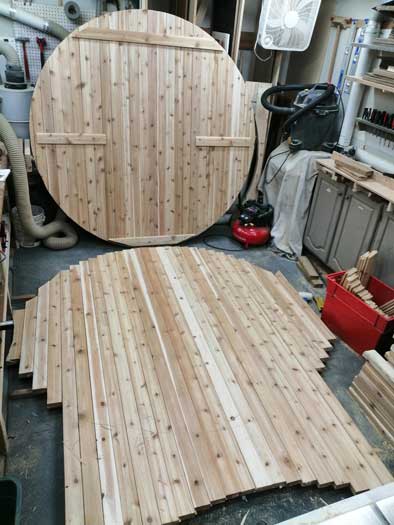
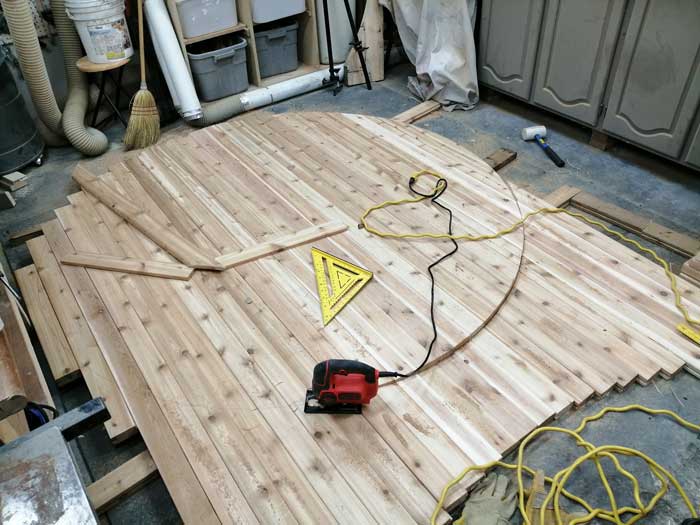
The first circle will become the back wall of the sauna, the second circle will be the front wall. The front wall needs a door so I drew a rectangle, dropped a circular saw onto the wood and cut out a door.
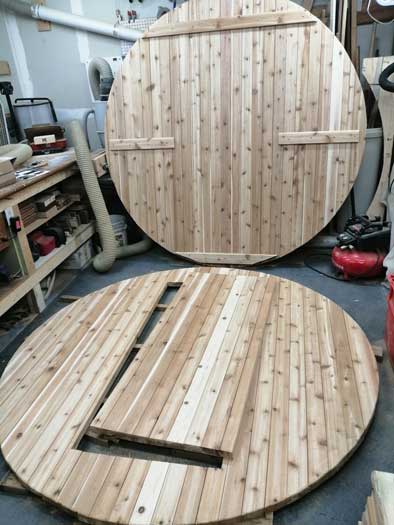
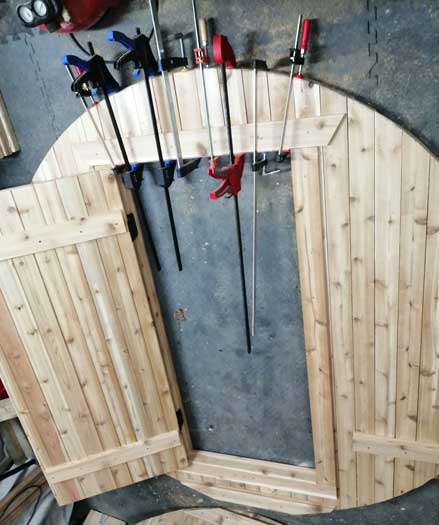
Here we can see I added some hinges, cross braces and framing to the doorway.
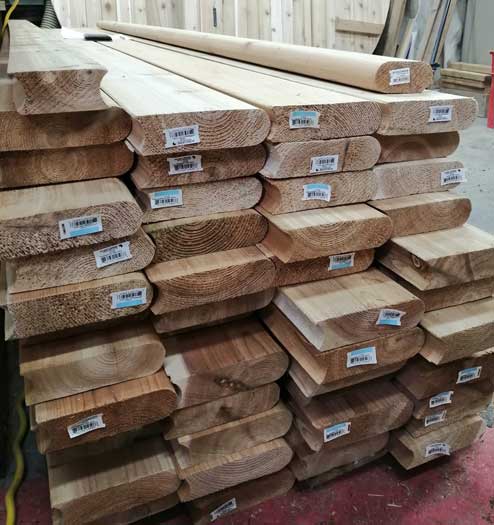
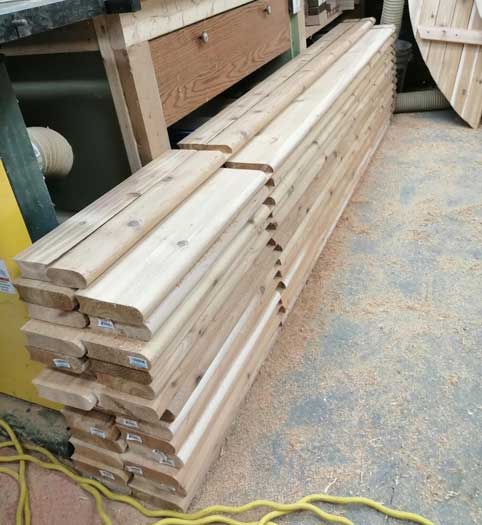
Now it is time to shape the 2x6s. These boards need to have a cove and bead cut on each end. This was the most time consuming to do on the router as I couldn't cut the cove or bead joints in one pass without stalling the router. 52 x 4 passes resulted in the following pile of wood. The bottom most board is a 2x4 with bead cuts on both ends, and the top most board is a 2x4 with cove cuts on both ends. All the others are 2x6's with one bead and one cove cut on each end.
The back wall will be 3" from the end and the front wall will be 18" from the other end. I created a jig to accurately position my router to cut the necessary grooves at each location.
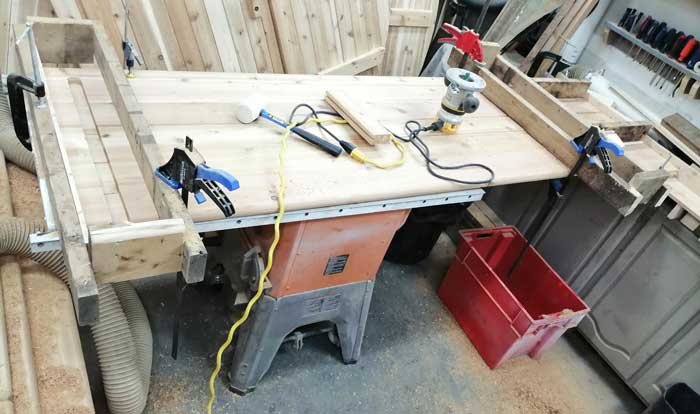
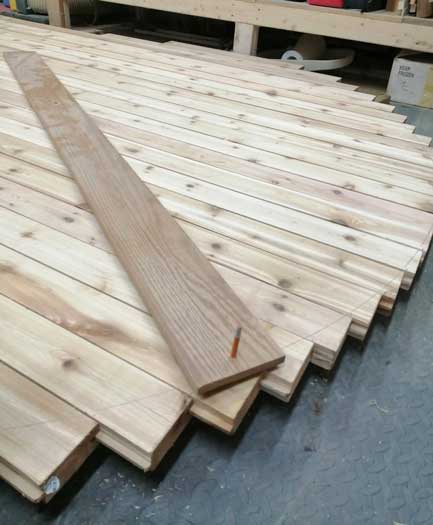
Here is half of the 2x6 boards completed. The other half need to be the mirror image, with the coves and beads sides reversed.
Next up was the cradle. The cradle is made up of a bunch of wood cut with a 7' diameter circle cut out of each section so that the barrel can sit inside it. All 3 cradle pieces needed to be leveled perfectly so that the barrel can be mounted on top. The first 2x4 with the double bead joints is then screwed into the three cradle legs.
Now for the time lapse build video!
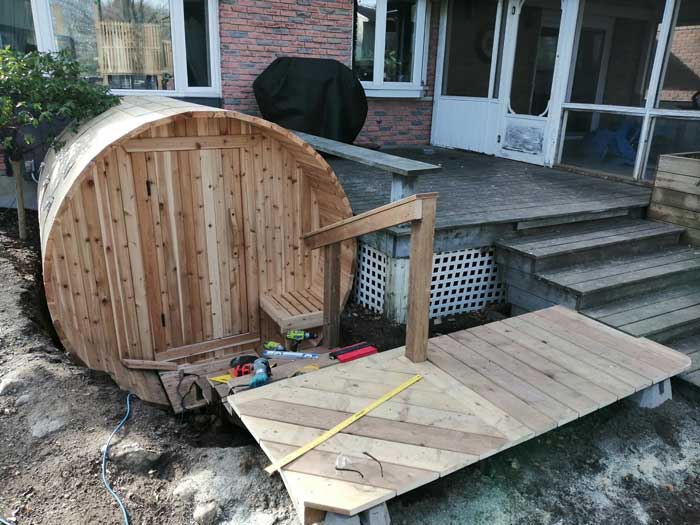
Once the barrel was assembled, I needed to build some stairs that lead down into the barrel. In the photo below we can also see the floor that was added to the inside.
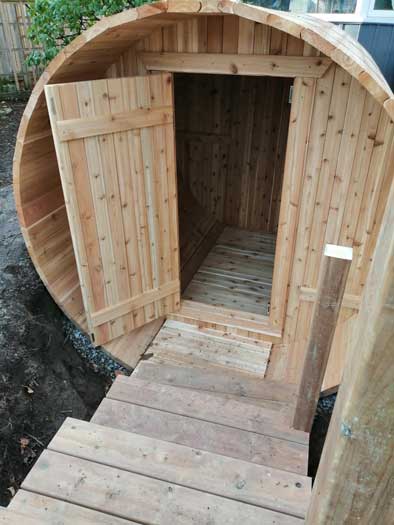
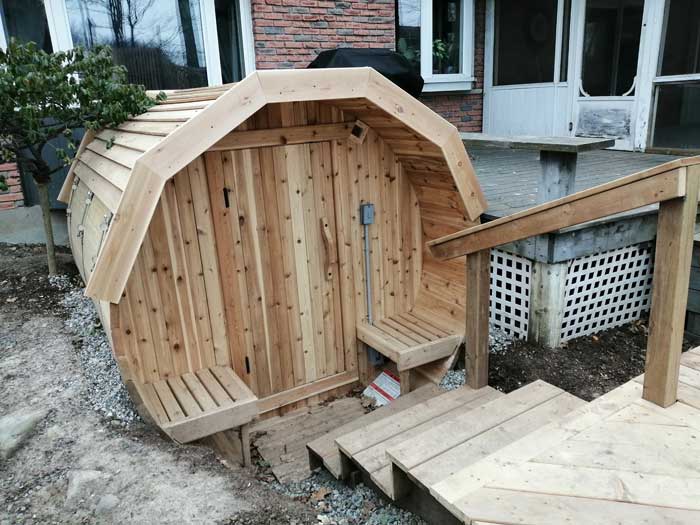
Here we see the completed railing for the stairs and the walkway that connects the sauna stairs to the existing deck stairs. I've also just completed building one of the exterior seats by the door.
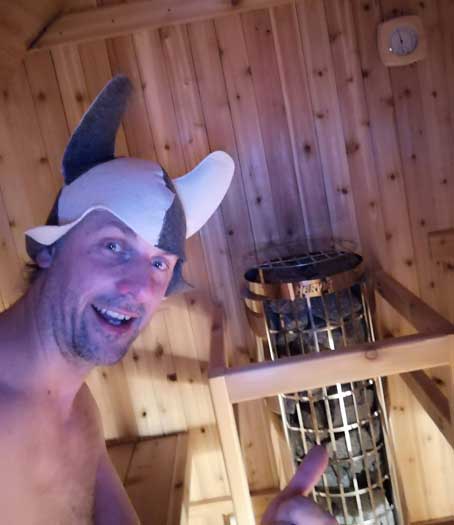
The sauna heater is placed at the back wall surrounded by a wooden cage. The door handles (both inside and outside) were made from a 2x4 to match.
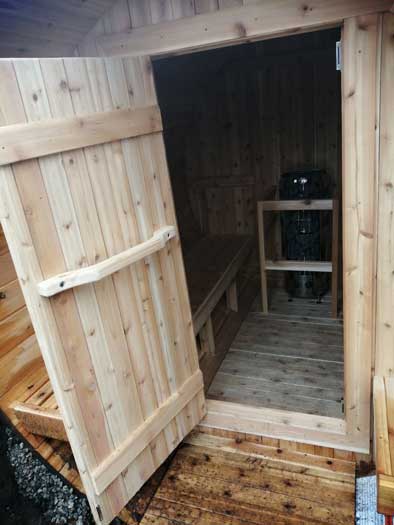
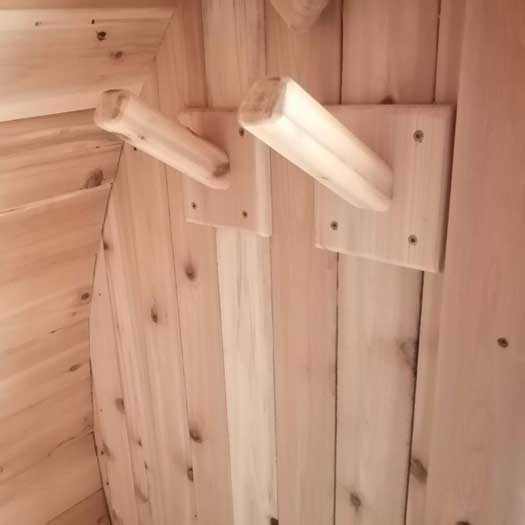
I added vent holes on both ends of the sauna to circulate the air inside, and two chunky coat hooks by the door where you can hang things up.
After the first rain, I noticed that there are a few places where the cove and bead joints don't line up perfectly so the rain water drips inside. To fix the leaks I decided to build a roof overtop of the sauna to deflect the water away.
Inside the sauna I built benches on both sides where you can sit or lay down. Each side has a low bench and a high bench. The high bench can be folded up and pinned against the wall.

Now I can sit and relax.... sauna selfie!